Dr. Google gets average precision of 0.988 in classifying infected vs. non-infected
Google’s AutoML services have been promoted as making machine learning accessible for people who may not have a lot of ML expertise. The idea behind AutoML is that it will automatically determine the best model and hyperparameters for your data. This can take a lot of CPU power, so Google argues that it’s best to do it in the cloud, because there’s no sense in having that kind of computing power lying around idle (except for the brief intervals during which you’re training a model).
In the case of the Google AutoML Vision service, you can use a graphical UI to drag in a bunch of images, label them, and start learning with the click of a button. While that’s theoretically true, to make effective use of Google AutoML Vision for a real-world problem, you’re going to want to have some understanding of the Google Cloud Platform (in particular, storage buckets, and IAM permissions), and probably a little Linux command line expertise. And if you want to actually build an application that uses your ML model, of course you’re going to do some programming.
Google’s AutoML service has generated a lot of hype. Actually it’s also generated some criticism–that it’s overhyped, and that throwing a shitload of CPU at a problem in order to determine the best ML model is not as good an approach as having a smart insightful person apply their smarts and insights. That’s probably true, but as I’ll show, this is still useful tool, and while there were some things that bugged me about it, the results were pretty compelling relative to the effort involved. People have also complained about the cost. I managed to get a trial Google Cloud Platform (GCP) account with $300 in credit, so this didn’t cost me any green dollars. If you check, you might be able to get the same deal. Apparently it costs about $20 per hour of training, but you can get an hour for free. I managed to train my model within an hour.
Background: NIH Malaria Dataset
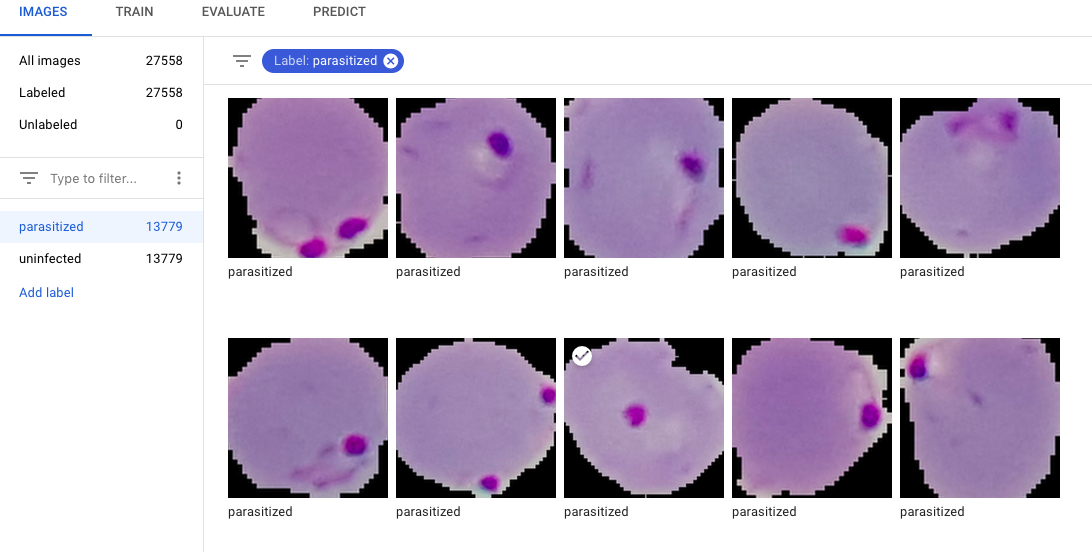
In this post, I’m going to grab a malaria dataset that originated with the National Institute of Health (NIH), but which someone posted on Kaggle. It contains over 27,000 PNG images of blood smears, half of which show malaria and half of which don’t. According to the NIH: “…the images were manually annotated by an expert slide reader at the Mahidol-Oxford Tropical Medicine Research Unit in Bangkok, Thailand.”
Here are a few of the images in the dataset, shown after I imported them into AutoML.
Results
First, let’s take a look at the results. Following that, I’ll provide a bit more detail on how to load the images into the tool, train the model, and call the API to make a prediction from a Python program.
Once training has completed, Google AutoML Vision provides a nice summary showing the results, including some graphs of recall vs. precision, and the confusion matrix. So on the test data, Google got 94.8% accuracy. Not bad.


Loading data into Google AutoML Vision
If you login to the GCP Console, you’ll find the menu item for Vision (It’s under “Machine Learning”). If you fire that up, it will ask you if you want to create a custom model, or use a pre-trained model (which is pretty cool if you want it to recognize run-of-the-mill objects, or pictures of celebrities, but that’s not going to work for our malaria dataset). Select Custom Model.
While you can drag and drop the images into the Google AutoML Vision web page, good luck doing that with 27,000 images. Instead, you need to get them into a Google Cloud Storage bucket. This is actually a bit of a pain, because you can’t download a zip file containing all of the images to a GCP bucket, and unzip it there with the Google storage command line interface. You might be able to find a way to do that with a little programming, but instead I just created a Linux VM in GCP attached a large disk to it, and downloaded the large images zip file from Kaggle to my drive. I unzipped the files and then moved them into a Cloud Storage bucket with the Google GSUTIL command line utilities. Once you start using AutoML Vision with the custom model, Google creates a cloud storage bucket for you, and gives AutoML Vision permissions to access it. So ideally, you should move your images into that bucket. It normally has a name like project_name-vcm, where project_name is the GCP project that you are using. (Projects serve as a kind of “container” within GCP, for resources that you want to group, logically. You can group servers, storage buckets, etc.)
To copy your files to your bucket, after unzipping them on the VM’s disk, use the GSUTIL cp command. Make sure you use the -m flag to speed things up (multi-threaded copying).
gsutil -m cp -r my-images-directory gs://mike-image-recognition-vcm
Now you need to build a file that Google AutoML will use to find the images in the bucket. This is just a CSV that contains the path to each file, and the label (uninfected or parasitized). Before starting, I unzipped all the files and ended up with 2 directories: one containing files labeled as parasitized, and one containing files labeled uninfected. I did the following steps from the Linux command line:
# from the Linux command line, cd to the Parasitized directory and put all file names in a file.
# Watch out that you don't end up with extraneous entries in your file, like thumbs.db.  AutoML will puke on that
ls > parasitized_labels.csv

# add 'parasitized' as a label to all lines in the file. I believe AutoML wants lower case labels
sed -i 's|$|,parasitized|' parasitized_labels.csv

# do the same for uninfected files.
ls > uninfected_labels.csv
sed -i 's|$|,uninfected|' uninfected_labels.csv

# Combine the two files into one, called malaria_labels.csv
cat parasitized_labels.csv >> malaria_labels.csv
cat uninfected_labels.csv >> malaria_labels.csv

# add the Google Cloud Storage bucket path to the start of each line in the file
sed 's|^|gs://mike-image-recognition-vcm/malaria/allimages/|' malaria_labels.csv
Optionally, you can also specify whether you want a given image to be used for training, evaluation, or testing. If you don’t, Google AutoML will decide automatically. I just let AutoML handle it, although I later regretted this somewhat because AutoML didn’t seem to have a way of finding out, after the fact, which images were used for training, etc.
Having done all that, you’ve got a file that describes the location of your 27,000+ files, and labels them. Now, you need to copy the malaria_labels.csv file into the same Google storage bucket where your images reside. The path within the bucket doesn’t matter. Once again, do this with the GSUTIL command, like above.
Creating your Dataset
Now it’s time to create your dataset in the Google AutoML Vision UI. Click “Create Dataset”, give your dataset a name, and provide a path to your CSV file (created as above), describing your files and your labels, which must be inside the bucket that AutoML Vision created. If AutoML Vision doesn’t like your CSV, you’ll get an error message, so you can fix the error and try again.
It will take a little while for AutoML to import all of your images. Once it’s complete, you should see the AutoML UI come back and show you samples of all of your images, and some stats like the number images labeled as parasitized and uninfected.
Training
You train your model using the UI (there is also a command line interface). Just go to the Train tab, and start training. You can limit how much CPU will be used (remember, you pay for this). I limited my training to the 1 free hour, and managed to get the model trained within that time. AutoML Vision will come back with some stats on the training results, including your precision, recall, and a confusion matrix, shown above.
Predictions – Calling your Model from Python
Once you’ve trained your model, it’s automatically deployed as a REST web service. This is pretty cool because you can immediately call your model from an application and use it to make predictions. There’s no need to write any code or run a server to do this.
Google gives you some Python code for this, but I had some difficulty getting it to work without a couple changes. This it was mainly due to permissions. First you’ll need to make sure the AutoML API has been turned on. Go into the GCP console, enter AutoML in the search box, and you’ll find the screen where you need to do that pretty easily. You need to have a service account that has permission to use AutoML. I can’t remember if GCP created that for me when I started using AutoML, or if I had to create it myself. Anyway, the sample Python code that Google gives you assumes that this service account has been declared in your environment, and this sounded great, but that didn’t seem to work for me running Python in a Jupyter notebook on my Mac. So instead I declared the service account credentials in my code, explicitly. You’ll need to go into the IAM area of GCP, and download a JSON key file for your service account. You’ll provide a path to this key when you make the API call. This worked well. Here’s what I did:
If the code didn't show up in WordPress (above) then click here:
https://gist.github.com/mesadowski/ca907c00bf03acdfa098e6566922d621
Pros and Cons – What’s inside the box?
The pros of using Google AutoML are clear. You can train a custom model without coding, and the results are good. But there are some things that bugged me.
The main annoyance was that I wasn’t able to see what model AutoML ended up with. I couldn’t find out the model architecture, let alone find out the specific weights. If anyone knows how to do that let me know, but the UI doesn’t show it, and the command line tools didn’t seem to offer this. This would be helpful if I wanted to take the results and try to improve on them myself.
I was unable to see which images the tool had selected for training, evaluation, and testing. Perhaps I should just trust the tool, but I wanted to use my Python program to take the test images and run predictions on them myself. You can’t do that unless you predefined which images to use for test. I just tried it with a few random images, but it would be nice to know which ones were in the training set, test set, etc. I think Google needs to give users more visibility into what’s going on inside the box.
The tool is a bit intolerant of bad data in your CSV file. I might have hoped it would skip bad lines and keep going, but instead it threw an error and failed entirely.
But all in all Google’s AutoML Vision tool worked better than I expected, and I think some people who don’t have time to code their own models might find it to be useful.
